How to photograph Milky Way
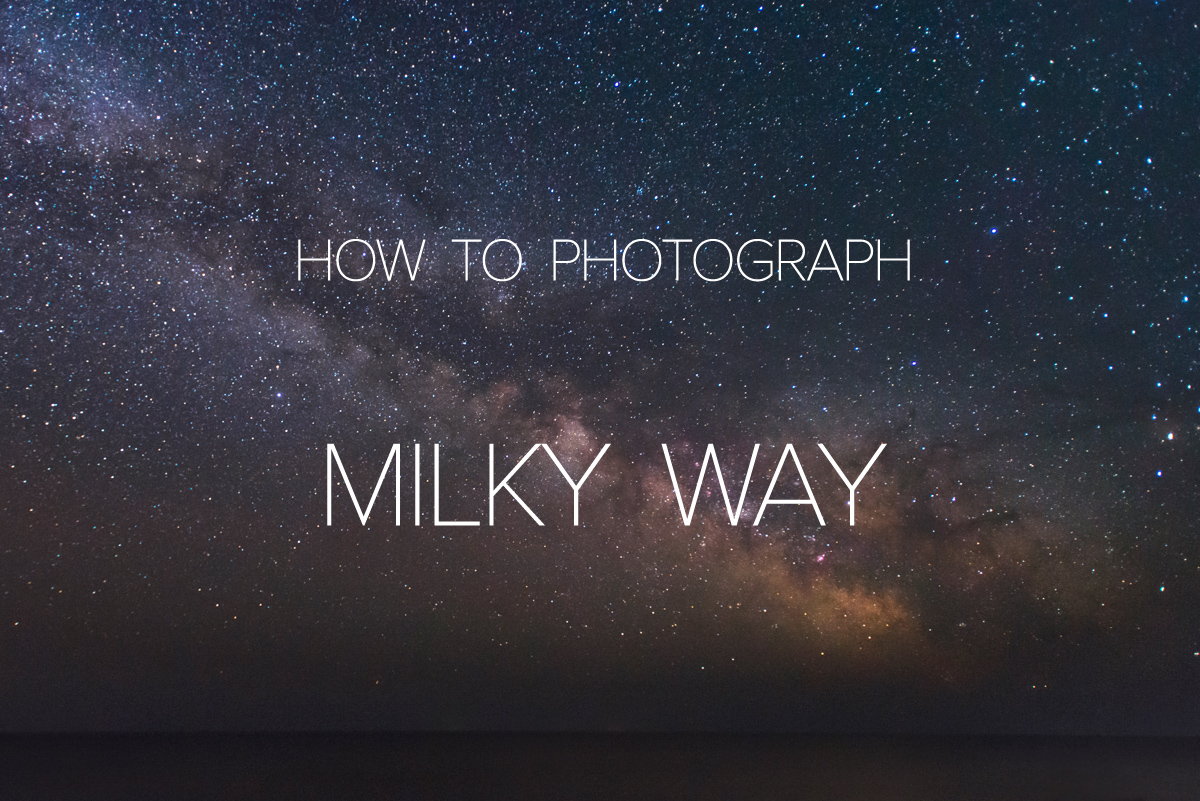
Landscapes with a strip of the Milky Way in the sky can be considered a classic of the genre in the art of night shooting. Even so, many novice photographers do not know how to make such a photo.
I constantly hear that in creating this kind of photos there are some unknown magic secrets that no one is in a hurry to open. How to get a contrasting image of the Milky Way with nebulae, dust clouds and the full range of colors that our galaxy has in the night sky?
In fact, of course, there is nothing supernatural in this method of photographing. There are three consecutive conditions that must be met when creating pictures with Milky Way. If you have previously failed in this way, then just because you did not fulfill one of these conditions.
- Dark sky
The Milky Way is a very dim object and it would be naive to assume that you can successfully capture it near cities where the whole sky is filled with light pollution or on those nights when the moon is shining.
And if you can simply wait for the left of the moon, the light of cities you can’t just drown out. Many people know about light pollution, but a very few of them represent its scale and try to solve this problem fully.
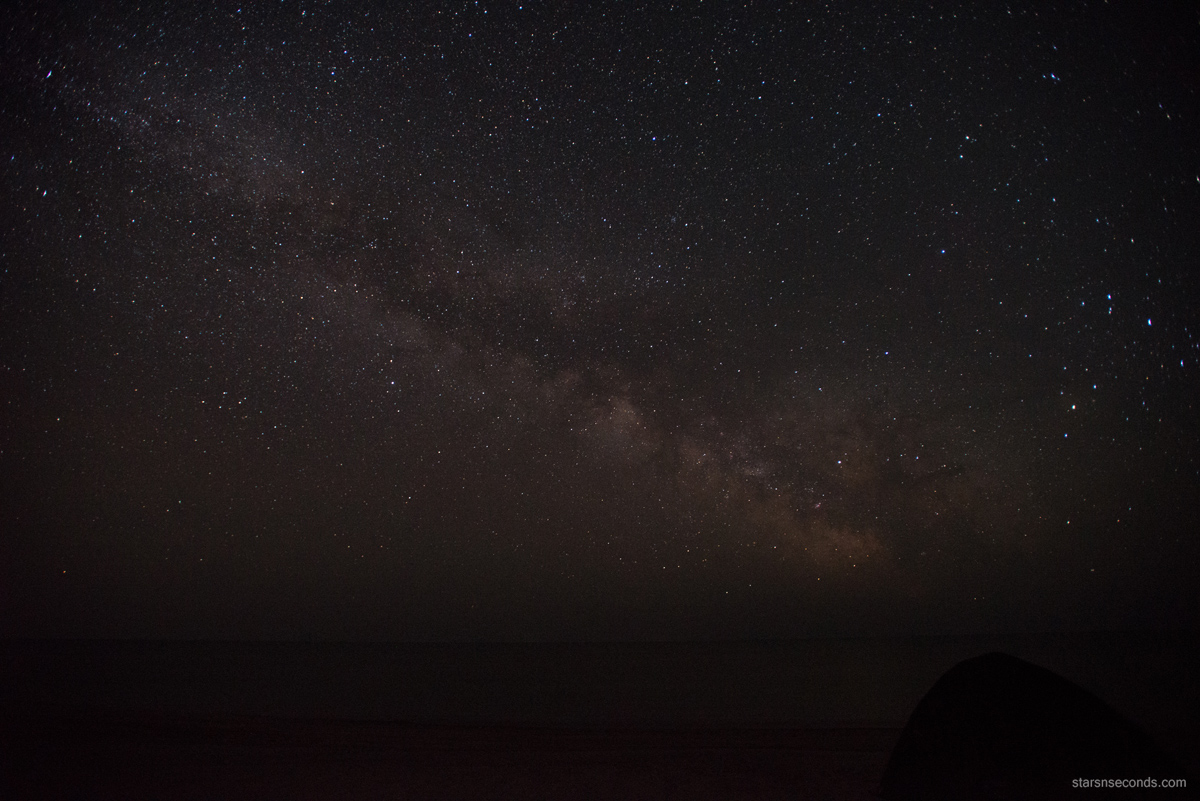
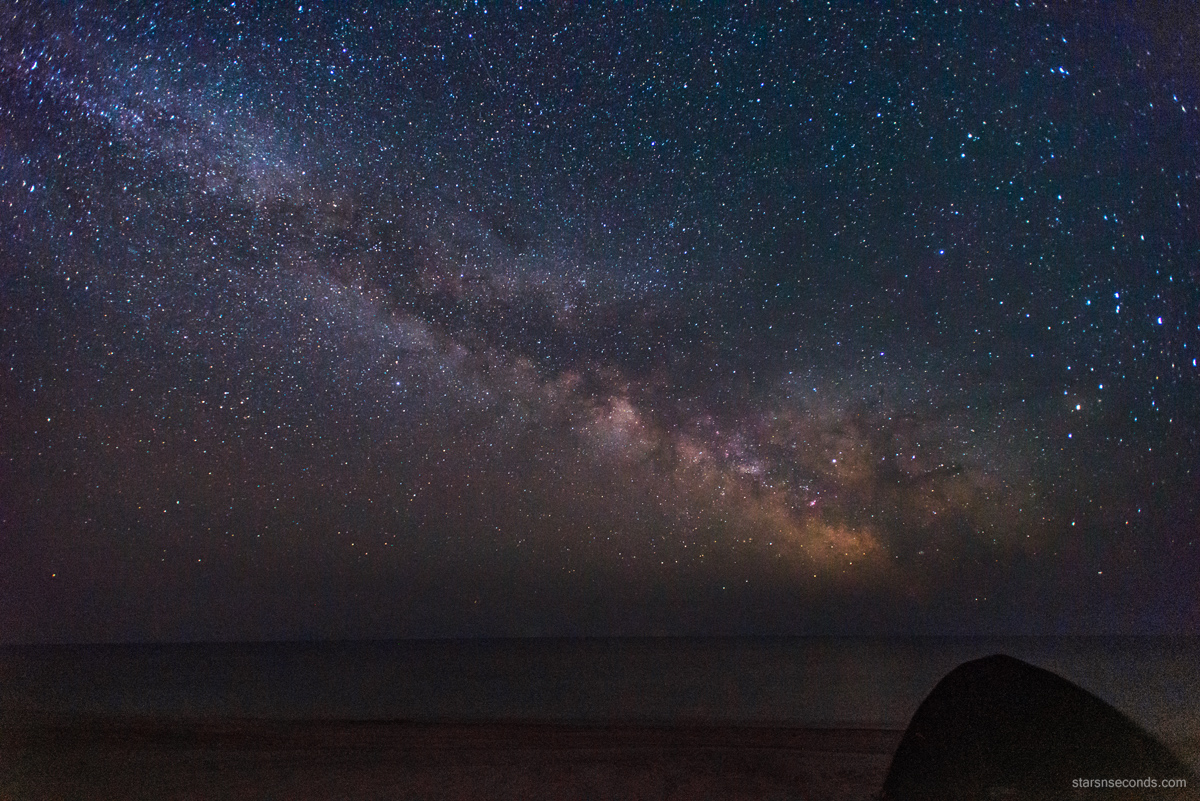
Let’s look at three identical photos from different places. These frames are made of the same technique with the same parameters: f/2.8; 15s.; iso6400; 4700K. When converting from RAW, only the lens profile was automatically corrected: distortion and vignetting were fixed.

The first picture was taken on the edge of the metropolis, 10 kilometers from its center. This is the boundary of the red zone, in the direction of the yellow, there are only small villages, so the horizon almost no domes of the illumination. Also managed to avoid sources of light that shine directly into the frame. Nevertheless, we can see how bright the sky is here and how poorly visible is the Milky Way. Despite the fact that the picture is still raw and has not been processed, I would not waste time on it. The best thing that can be done here is to leave such places far away.
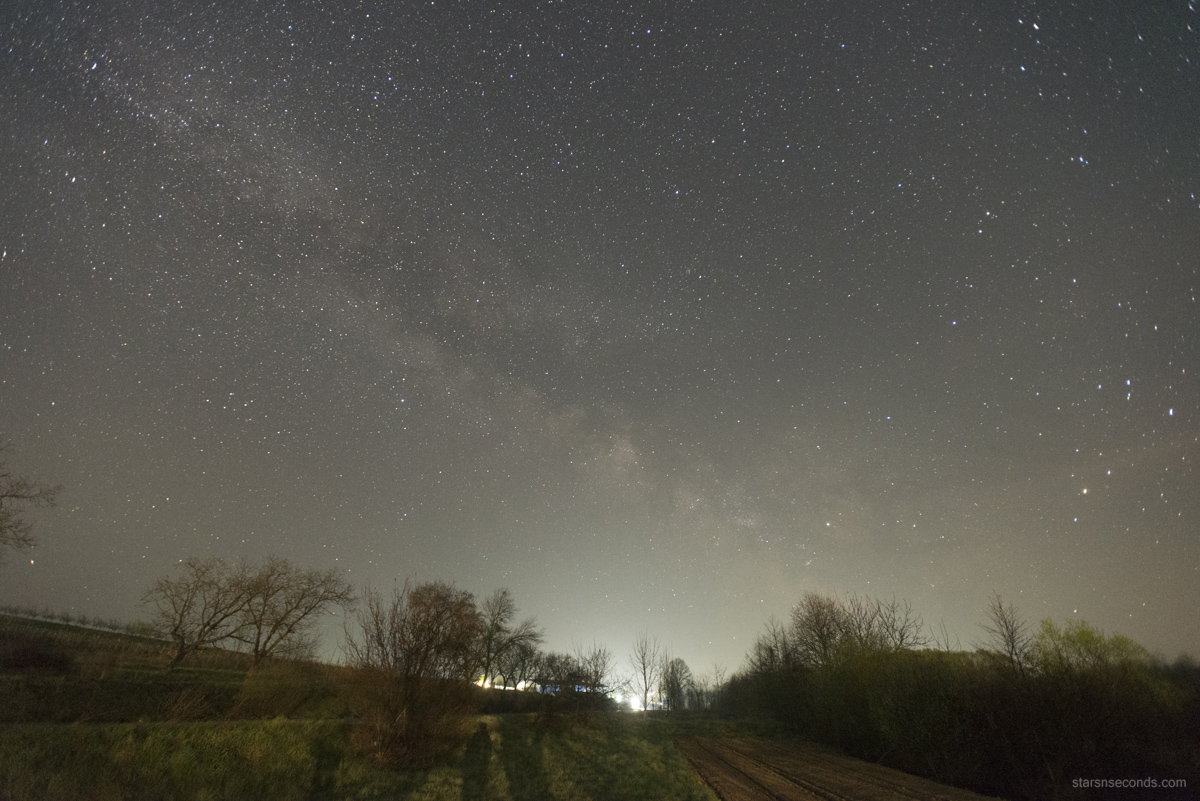
The second picture was taken in the countryside. To the center of the 100-thousandth city from here about 6 km in a straight line, but around this place only the forest. This is the border of the yellow zone, in the direction of the green. The sky here has already become darker and has acquired a more natural shade (I recall that the parameters, including the white balance, did not change). With local light pollution, no luck – we can see a few flashlights in the frame and a big dome from a small but very close village. If you managed to move aside or shoot in a different direction, it would be even better. This is the variant that most of us can count on to get an acceptable result. But let’s take a look at the third shot to get an idea of what we really need to strive for.
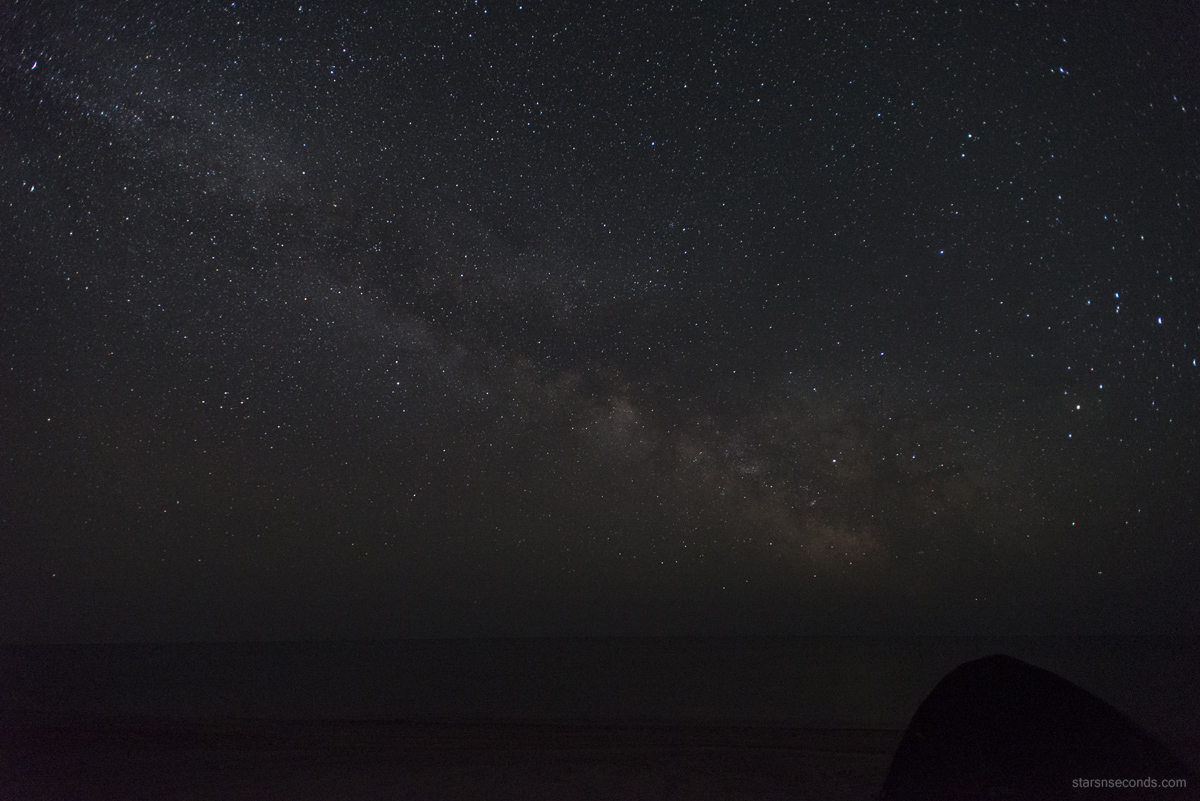
This photo is taken on a wild beach. Around in a radius of ten kilometers, there is no one at all. This is the border of the blue zone, in the direction of the black. Behind a back, above the skyline, there are domes of light, but in the frame, everything is clean, because there are thousands of kilometers of the sea. Honestly speaking, these are almost ideal conditions and a really completely dark sky. Against this background, the Milky Way, remaining the same as in the previous samples, perfectly selected even without any processing. A color appeared and the filaments of dust nebulae are perfectly visible.
Here, of course, many people have a logical question: but what if there is no possibility to escape far from the cities? The answer is simple: look for it! Of course, wild beaches, mountains, and deserts are easier said than done but do not think that you are alone in your problems and limited opportunities. Everyone gets this experience.
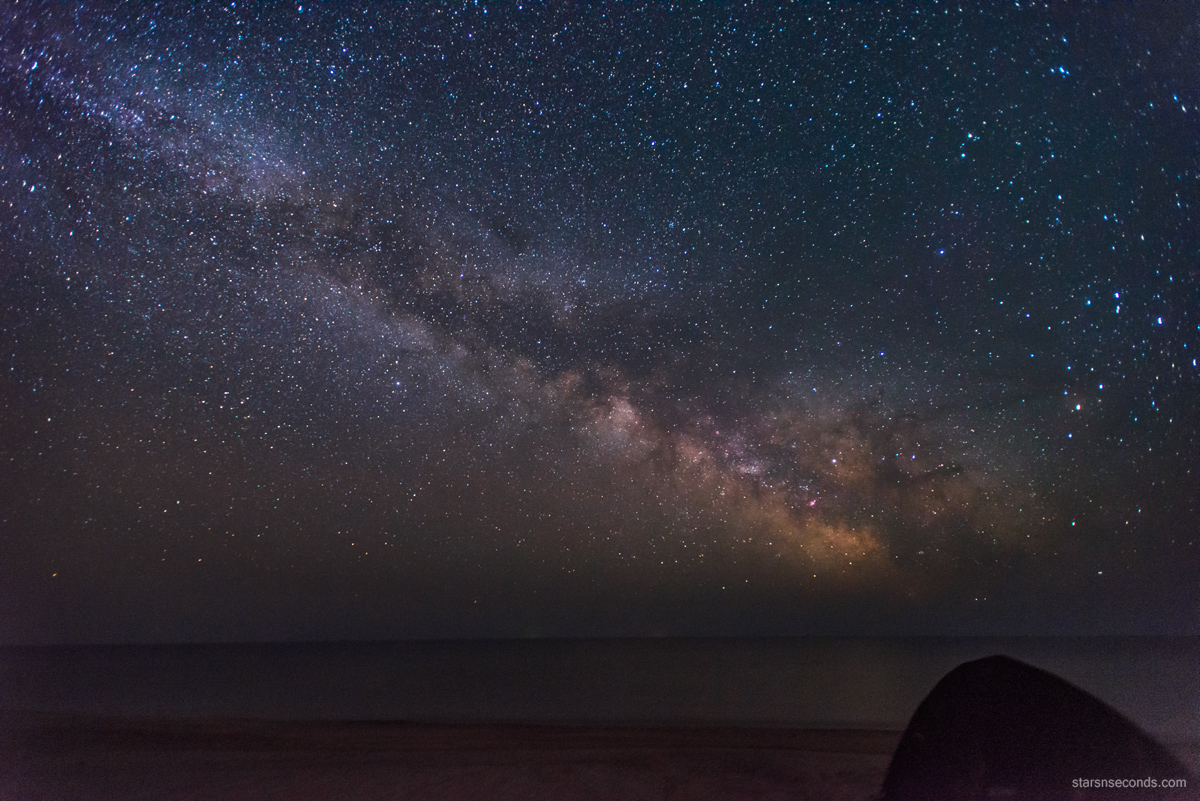
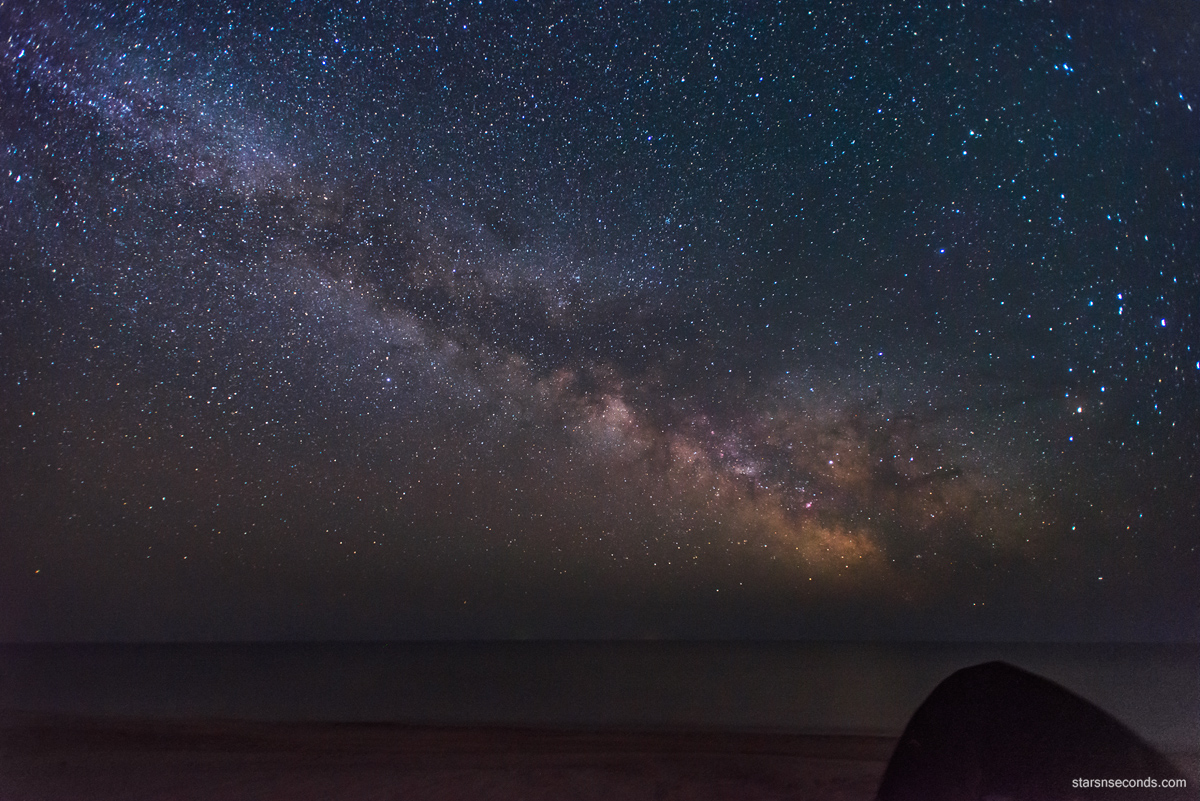
Look at these pictures:
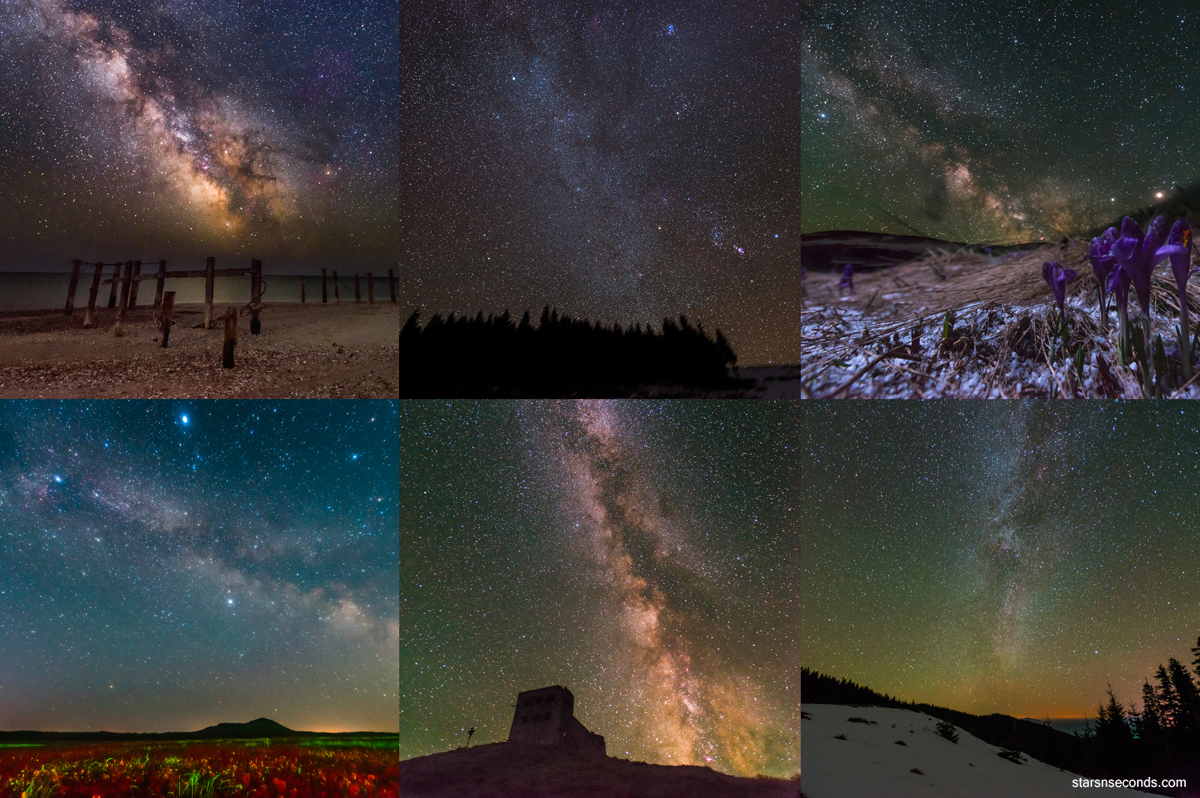
Whenever you see something like that, you should understand that this is not a shooting from the backyard or even in the field behind the road. Such pictures are the result of a journey into the night and not the merit of expensive technology or secret processing methods. The dark sky is your main ally in landscape astrophotography, and all your troubles will be from ignoring it.
Deep space is a whisper. Whispering is hard to select among the shouts, but you’ll easily hear it in silence;) This is where you need to start. And, in fact, this could be finished. The rest is trifles.
- Enough of exposure
In this type of shooting, there is always the task of collecting as much light as possible, so we open the diaphragm completely. There are 2.8 – good. There are only 3.5 – not so bad, it’s only 2/3 stop less. Whatever it was, open it to the maximum!
The rotation of the Earth essentially limits the duration of exposure, at which the stars still remain dots. In our case, it will always be about 15-20 seconds. If you are ready to accept the fact that the stars will be slightly smeared, you can increase to 25-30. The result of longer exposures will be tracks.
You probably noticed the high value of iso in the previous chapter. Many are horrified when they see such values. Undoubtedly, there will be a lot of noise for such sensitivity, but we really do not have a choice. As I said at the beginning of this article, the Milky Way is a very dim object. Nothing has changed since then, and to correctly expose it, even with a 2.8-3.5 diaphragm and an exposure of 15-30 seconds, you still need to increase the sensitivity.
Let’s compare the result to different values of sensitivity for the same parameters: aperture 2.8, exposure time 15 seconds, no processing, only profile correction.
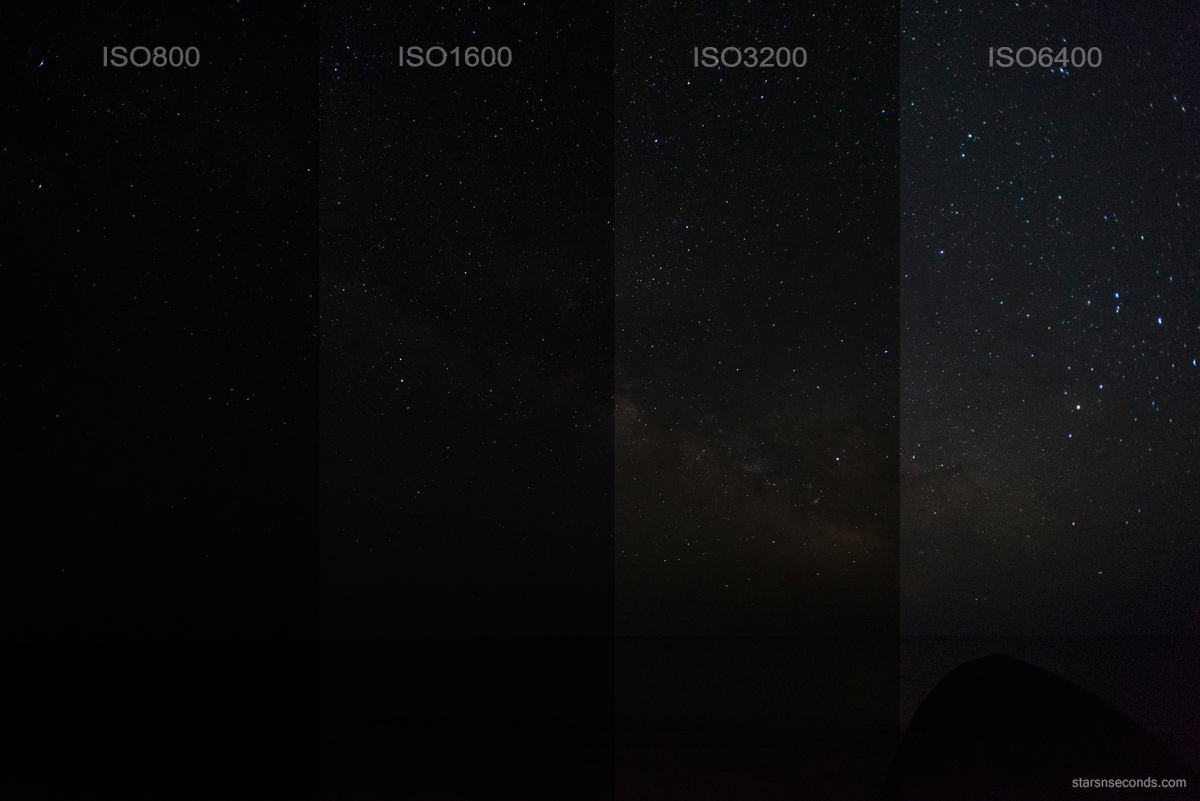
At the iso800 Milky Way is practically nonexistent; At iso1600 it is barely distinguishable; At iso3200 we are already getting acceptable, but still very dark picture; And only at iso6400 the sky was manifested enough and at least we can see some details on the ground.

Along with the brightness, a number of noise increases, but there is no problem. In any case, you need to somehow expose the Milky Way, whether you do it at the processing stage or immediately raise the value of iso – the result will not change.
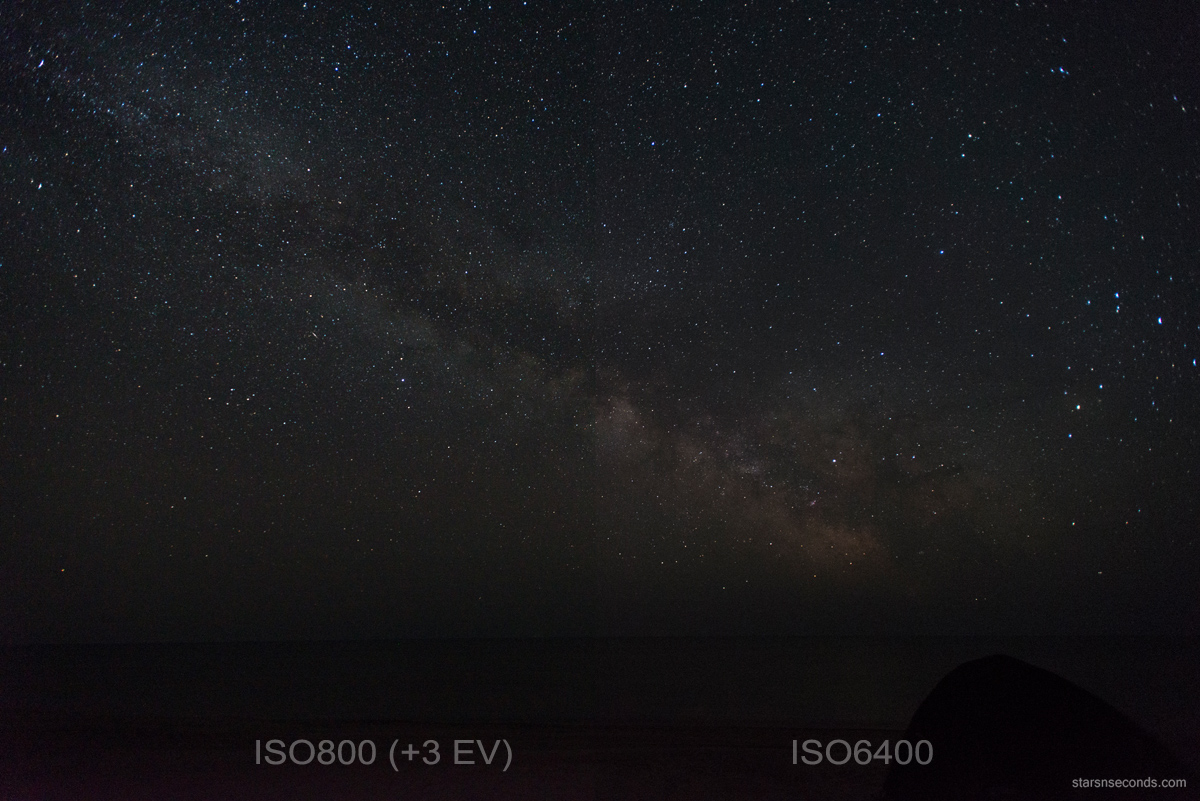
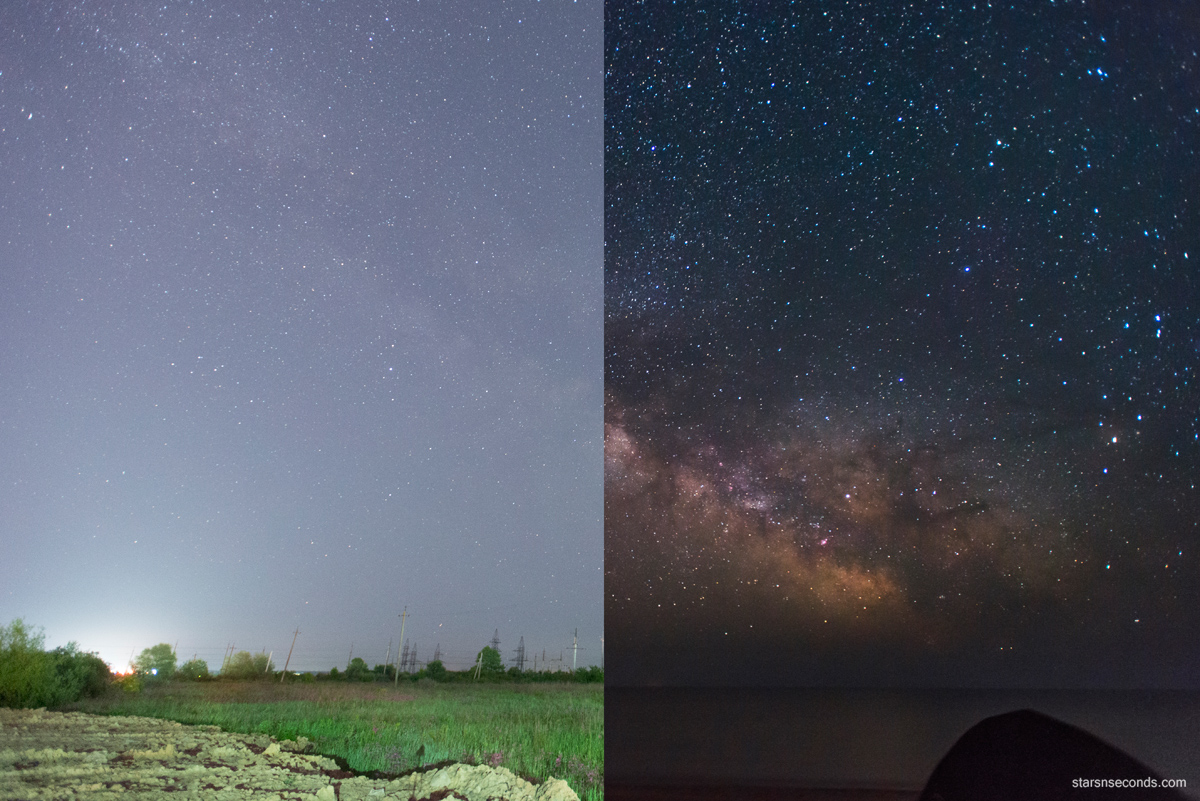
On the left is the same photograph taken on the iso800, but with the addition of three exposure levels in the RAW converter. On the right – iso6400 without any manipulation.

As you can see, there is no difference.
In conditions where the diaphragm is already open and the shutter speed is limited, raising the sensitivity is all that remains. And no matter how your camera is noisy, you do not need to entertain yourself with illusions that a dark picture at lower values is a worthy alternative. The only thing you can do is use a more luminous lens to open the aperture even more or mount it to increase the shutter speed. All this – additional costs and we will not consider them in this article.
- Competent processing
Even a high-quality raw picture needs careful processing. The main thing here is a sense of proportion. Let’s see what we can do with our old friend:
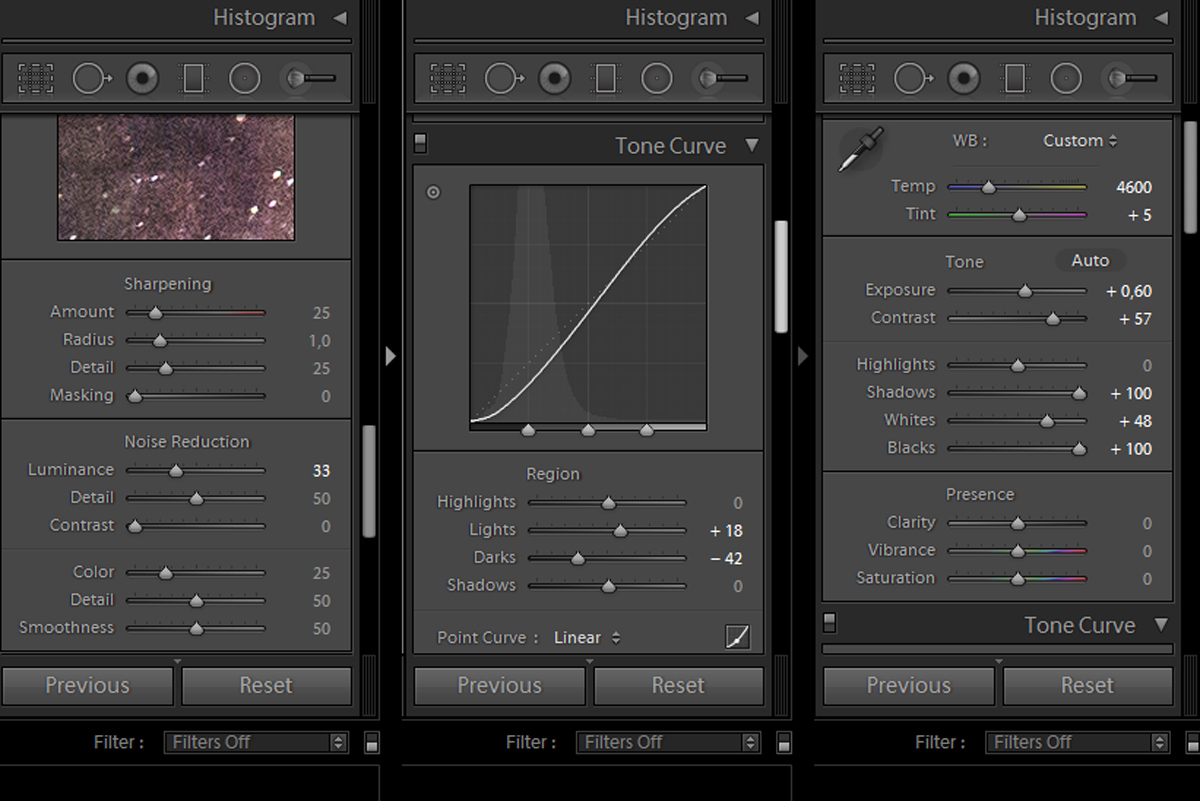
In Lightroom remove the noise, draw out the shadow, slightly adjust the white balance, add contrast and slightly raise the exposure, because the frame was initially a bit dark. Of course, we do not forget about the correction of the lens profile and chromatic aberrations.
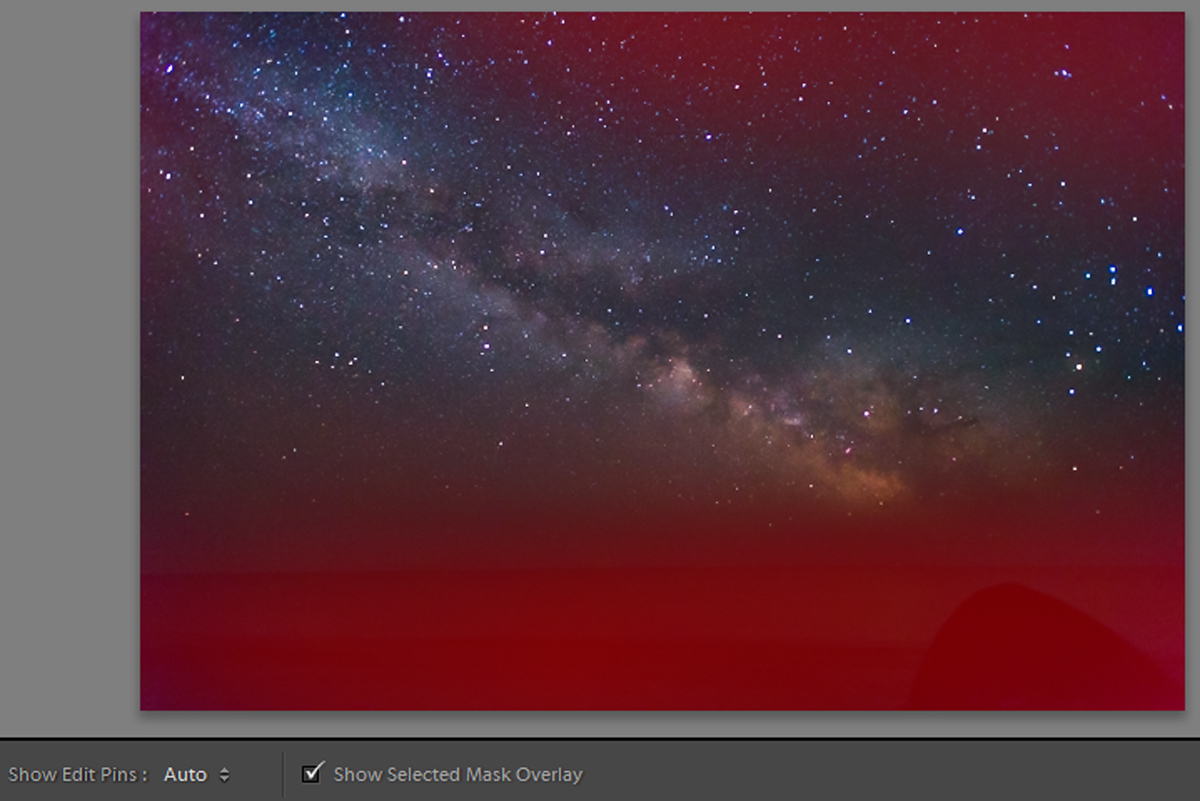
Selectively lighten by the brush the darkest parts of the image – the ground and corners.
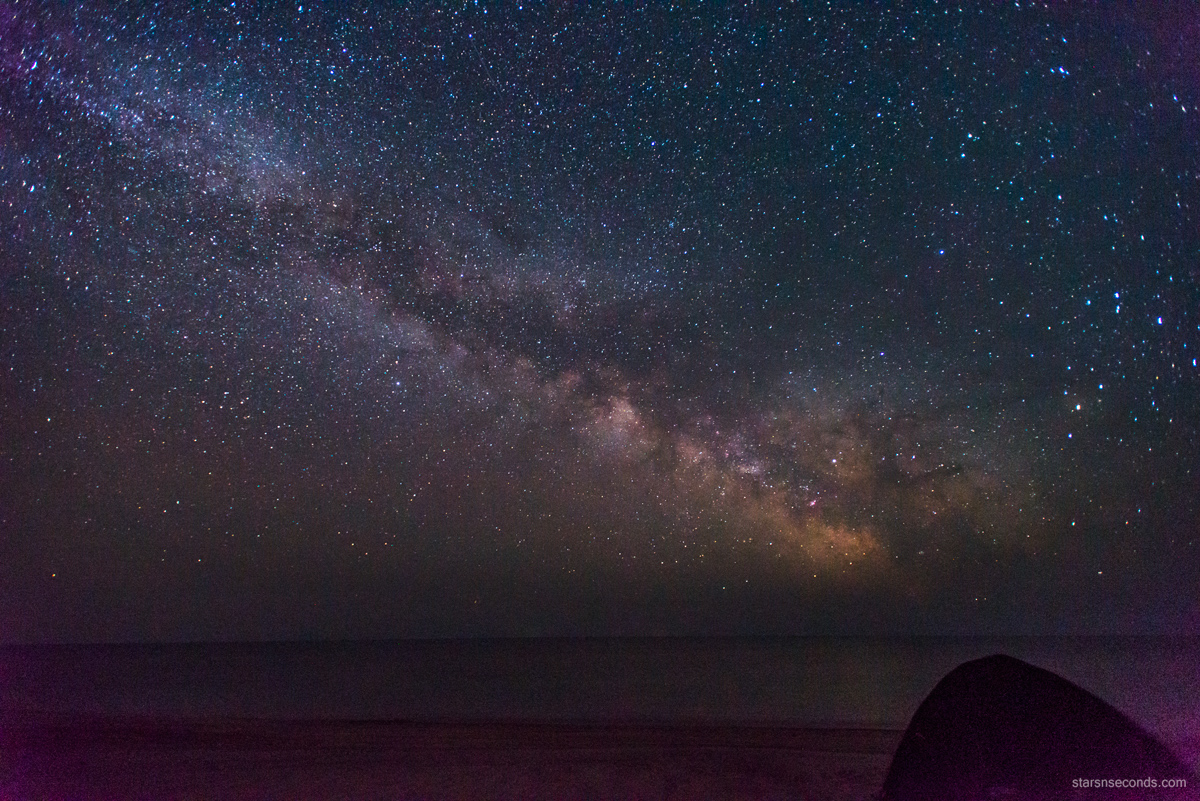
At the output, we get this result. The picture is almost ready, there’s something left to do with these terrible noises.
The parasitic purple tint on the ground and at the corners of the frame is removed in Photoshop by selective color correction.
Also using Photoshop, we add together 3 more duplicates of this image. As a result, after averaging 4 frames, we significantly reduce the brightness and chromatic noise.
The most persistent noise in the corners is achieved by selective noise reduction, leveling the horizon, cropping the image. Done!
Summarize:
How to photograph the Milky Way?
1. Looking for a dark sky
2. Open the diaphragm, set the maximum possible shutter speed and do not be afraid to raise ISO (if the light in the frame does not allow you to do this, see step 1)
3. We shoot in RAW and carefully extract all information from it: add contrast, lighten the darkest areas. With noise, we fight by averaging several frames.
That’s the whole secret!
I hope the article was useful to you. In the near future on starsnseconds.com new publications will appear, where the process of shooting and processing of images will be highlighted in more detail.
I wish everyone a clear sky and inspiration. See you soon!